Lab 12 1
Summary:
In this lab we configured a wireless router.
The crossover cable did not work from Router0 to Webserver, I was forced into using the autocable picker thing from packet tracer, where it then worked.
Introduction:
In this activity, you will configure an access point, allowing for remote access from PCs as well as wireless connectivity with WPA2 security. You will manually configure PC wireless connectivity by entering the router SSID and password. In this lab we will be using the Dynamic Host Configuration Protocol (DHCP) to use a special group of IP addresses which have been assigned for LAN use only and can never be routed on the Internet. When properly configured, DHCP automatically assigns IP addresses to connecting hosts. The addresses you will be using are on the 192.168.0.0/24 network.
Starter File:
NET-150-Lab-12-2-Starter.pktDownload NET-150-Lab-12-2-Starter.pkt
Lab:
- Document your work in your Tech Journal taking meticulous notes of the
steps you take during the implementation of this lab. Words and pictures are
both good. Be sure to document any problems you had in the completion of
this lab as well as your successes.
Part 1: Configure a Wireless Router
Step 1: Configure the Internet connection type on the WR.
- Click WR > GUI
- Set the Internet Connection type to Static IP.
- Configure the Internet IP address according to the Addressing Table.
Step 2: Configure the network setup.
- Scroll down to Network Setup. For the Router IP option, set the IP address to the Wireless Router’s LAN address and the subnet mask
- Enable the DHCP server.
- Scroll to the bottom of the page and click Save Settings.
Step 3: Configure wireless access and security.
- At the top of the window, click Wireless. Set the Network Mode to Wireless-N Only and change the SSID to whatever you want to call your network.
- Disable SSID Broadcast and click Save Settings.
- Click the Wireless Security
- Change the Security Mode from Disabled to WPA2 Personal.
- Configure a passphrase.
- Scroll to the bottom of the page and click Save Settings.
Part 2: Configure a Wireless Client
Step 1: Configure Laptop1 for wireless connectivity.
Because SSID broadcast is disabled, you must manually configure Laptop1 with the correct SSID and passphrase to establish a connection with the router.
- Click Laptop1 > Desktop > PC Wireless.
- Click the Profiles
- Click New.
- Name the new profile Wireless Access.
- On the next screen, click Advanced Setup. Leave on Infrastructure Mode. Then manually enter the SSID of your network on Wireless Network Name. Click Next.
- Choose Obtain network settings automatically (DHCP) as the network settings, and then click Next.
- On Wireless Security, choose WPA2-Personal as the method of encryption and click Next.
- Enter the passphrase and click Next.
- Click Save and then click Connect to Network.
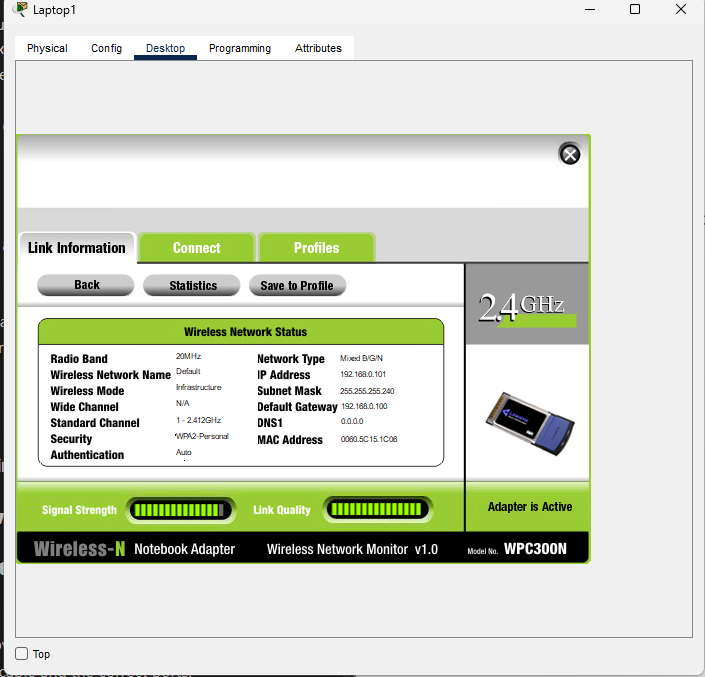
Step 2: Verify Laptop1 wireless connectivity and IP addressing configuration.
- The Signal Strength and Link Quality indicators should show that you have a strong signal.
- Click More Information to see details of the connection including IP addressing information. SCREENSHOT #1
- Close the PC Wireless configuration window
Step 3: Configure Laptops 2 and 3 to connect to Wireless
Part 3: Connect to Wired Router and Web Server
Step 1: Configure the Wired Router with the correct IP addresses per the Table
- Connect the Wired Router to the Wireless Router using a crossover cable and correct ports
- Connect the Wired Router to the Web Server using a crossover cable and the correct ports.
Step 2: Access Web server from the Laptops
-
Using the Web Browser on the laptops – connect to the Web Server
-
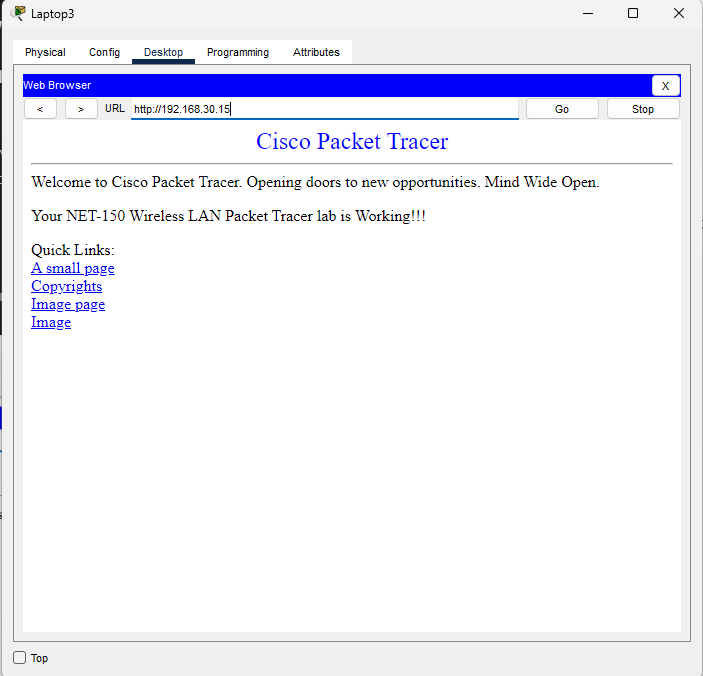
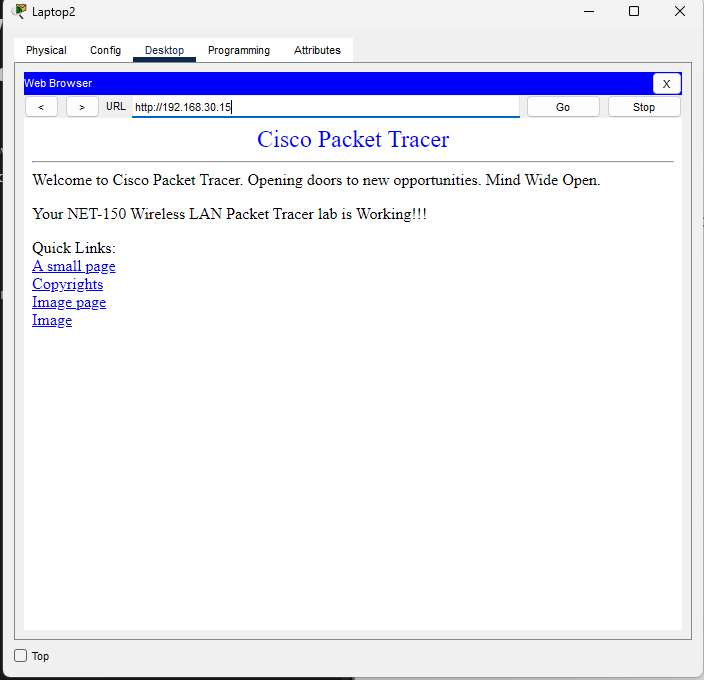
Show Laptop 2 connecting to Web Server. SCREENSHOT #2
-
Show Laptop 3 connecting to Web Server. SCREENSHOT #3